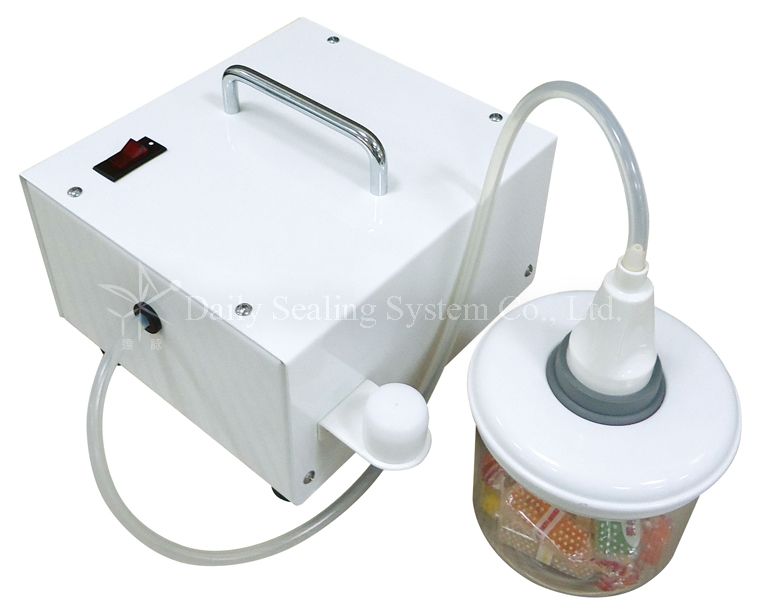
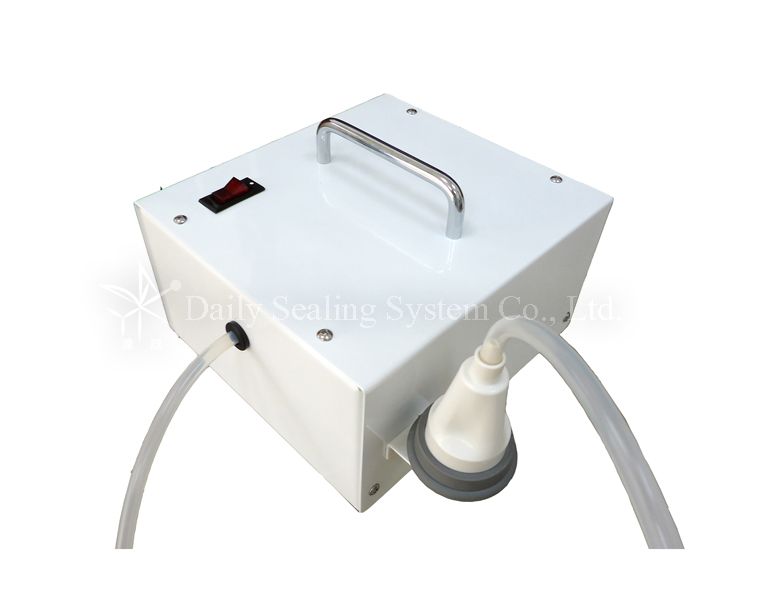
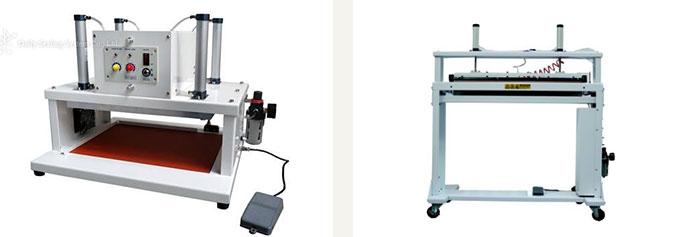
Designed for vacuum container and air valve bags, it can be easy to vacuum air out.
- Detail
- Video
Vacuum Machine:
• Designed for vacuum container and air valve bags, it can be easy to vacuum air out.
• Users turn on and off power switch to control vacuum time directly, easy to operate.
• The vauum lid could be custom made which depends on customer`s demands.
• We also offer vacuum containers.
Specification
| Model No. | DAV-MB |
|---|---|
| Voltage/Ampere | 110V / 2.5A, 220V |
| Power | 280W(110V) |
| Vacuum time | Adjustable |
| Machine weight | 3.32 kgs |
| Machine size | 218 x 205 x 151 mm |
Vacuum Machine:
You May Also Like
(57).jpg)
DP-VC0403
Vacuum Container
Keep fresh and prevent food from humidity and pests. Extend its life and reduce damage of goods due to moisture.
(56).jpg)
DAV-MA
Deluxe Vacuum Machine
Vacuum time controlled. Designed for vacuum container and air valve bags, it can be easy to vacuum air out.
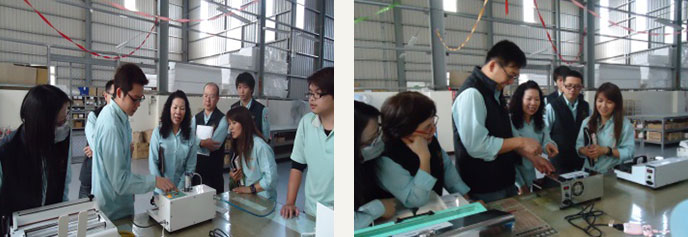
Why Choosing Dailysealing
Parts and material quality control
- Heating elements are from Japan.
- Motor, Transformers, PCB and vacuum bags are made in Taiwan.
Strict quality control
- 100% product inspection: The inspection is included functions and appearance of sealing machines.
- Tensile strength test to ensure the sealing line tensile strength value reaches the customer standard.
- Electric leakage test: Puncture and insulation test.
- Our production and inspection are all based on ISO 9001.
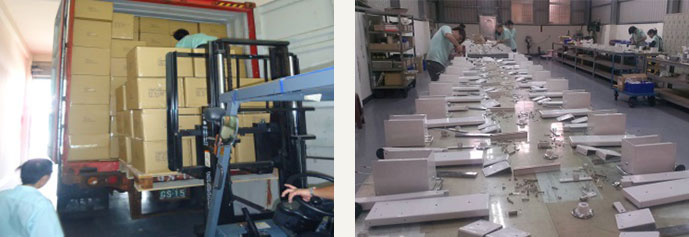
Professional packaging and sealing machine factory
- Produce many kinds sealing machines and ODM/OEM products and provide custom-made services.
- More than 30 year experiences in packaging machines industry.
- Sell sealing machines to America, Europe, Latin America and Asia.
- 85% products in stocks, so we can deliver the products quickly.
- The production process is based on SOP to ensure the quality of sealing machines consistently.
Complete range of specifications of sealing machines
- Complete range of specifications of sealing machines.
- Many kinds of sealing machines and consumptive materials in stocks, so customers can do one-stop shopping here.
- The customers include Biotechnology companies, Medical equipment companies, Food industry, Electronics industry, Handmade soap industry and other industry..
Custom-made sealing machine service
- Custom-made sealing machine service
- Designs of the special sealing machine for irregular shape sealing line, such as U-shape sealing line and L-shape sealing line.
- Different width of sealing line could be custom-made to meet customer requirements.
After-sales service of professional sealing machine
- Provide the professional service for repair the broken sealing machine immediately.
- The sufficient supply of parts stock, so don’t worry about the parts replace.
- Some parts of sealing machine are used in common specifications, so it is easy to get the parts for replace.
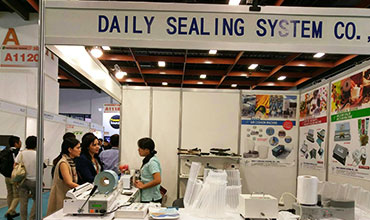
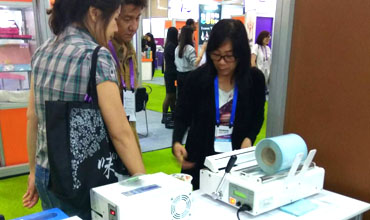
Exhibitions and trade shows


News

2024/11/15
How Do You Operate a Vacuum Sealer?
How Do You Operate a Vacuum Sealer? In this article, we delve into the "operation methods of a vacuum sealer," providing you with a clear and understandable guide. Whether you are a newcomer to vacuum sealers or a professional seeking to improve operational
efficiency, the following steps will help you better understand how to operate a vacuum sealer. How Do You Operate a Vacuum Sealer? 1: Preparation 1. Check the Vacuum Sealer: Before starting, ensure the vacuum machine is intact and all power connections
are secure. 2. Preheat the Vacuum Machine: Preheat the vacuum sealer to the appropriate temperature according to the manufacturer's instruction manual. How Do You Operate a Vacuum Sealer? 2: Placing the Vacuum Bag 1. Open the Lid: Gently open the lid of
the vacuum sealer. 2. Insert the Sealing Bag: Place the item you need to package into a specialized vacuum sealing bag, ensuring the bag's mouth is smooth and there is enough space to place it in the sealing slot. How Do You Operate a Vacuum Sealer? 3: Vacuum
Sealing 1. Start Vacuum Sealing: Close the lid, select the appropriate vacuum sealing mode, and start the machine to begin the vacuuming process. 2. Sealing: After completing the vacuuming, the machine will automatically seal the bag to ensure it is completely
sealed inside. How Do You Operate a Vacuum Sealer? 4: Finalizing the Seal 1. Check the Seal: After vacuum sealing and sealing, open the lid and take out the sealed bag. Check if the seal is strong to ensure there are no leaks. 2. Further Processing: Store
the sealed item as needed or proceed with further packaging. How Do You Operate a Vacuum Sealer? Tips: - Maintain Cleanliness: Ensure the vacuum sealer is clean before and after use to prevent food residue or other substances from affecting the seal quality.
- Regular Inspection: Regularly check for wear and tear on the vacuum machine, especially the sealing bar, to ensure the best sealing results. By following the above "operation methods of a vacuum sealer," you can easily complete the sealing process. Whether
it's for home use or commercial production, this ensures the freshness and extended shelf life of food, or allows you to reduce the volume and lower the air content of the items you vacuum seal. Conclusion Mastering the correct "operation methods of a vacuum
sealer" can not only improve work efficiency but also ensure packaging quality and extend the preservation time of food. How Do You Operate a Vacuum Sealer?
MORE
2026/4/29
How to Choose the Right Sealing Machine: A Complete Guide Based on Product Type
How to Choose a Bag Sealing Machine: Material, Product Type & Production Volume Guide With dozens of sealing machine types on the market — impulse sealers, band sealers, vacuum sealers, foot sealers, semi-automatic sealers, and more — selecting the wrong
equipment leads to poor seal quality, reduced throughput, and premature machine wear. This sealing machine buying guide is designed specifically for B2B buyers: read through once and you'll know exactly which type of bag sealing machine fits your product,
material, and production volume. Quick Answer: How to Choose a Sealing Machine — 4 Key Selection Criteria The most important factors in any sealing machine selection guide are: product content type, bag or pouch material, daily production volume, and whether
vacuum sealing is required. These four criteria determine the right sealing machine for your specific application — and they are the foundation of any accurate equipment recommendation. 1. Product Content Type: Sealing Machine for Powder, Liquid, or Solid
Products The first step in any sealing machine buying guide is identifying what you're packaging. A sealing machine for powder, liquid, or solid products will differ in design, operation method, and sealing requirements. Getting this wrong affects both seal
integrity and machine longevity. Equipment direction by product content type: Dry solid products (dried food, snacks, tea): Standard impulse or constant heat sealers work well; also compatible with vacuum sealers for shelf-life extension High-moisture products,
fresh meat, seafood: Vacuum sealer recommended — a chamber vacuum sealer prevents moisture from compromising the seal Powder products (coffee, flour, spices): Bag mouth must be clean before sealing to avoid seal contamination Liquid or sauce products: It is
recommended to use a chamber vacuum sealer, which creates negative pressure by evacuating the entire vacuum chamber and seals the bag simultaneously. Since it does not directly extract the contents inside the bag, there is no need to worry about moisture being
drawn out. 2. Bag / Pouch Material: Best Sealing Machine for Different Materials Material compatibility is a critical factor in how to choose a sealing machine. Sealing machines use either impulse heating or constant heat — and each bag material has a different
melting point and sealing behavior. Using the wrong machine for the material results in failed seals, burned pouches, or inconsistent output. Understanding which is the best sealing machine for different materials prevents costly mismatches. Material compatibility
guide: PE bags, OPP bags (standard plastic pouches): Compatible with impulse sealers — the most common sealing machine for plastic bags configuration Aluminum foil bags, laminated composite pouches: Require an adjustable-temperature constant heat sealer to
achieve sufficient heat penetration for a reliable seal — the most common sealing machine for aluminum foil bags requirement Vacuum channel bags (embossed/textured pouches): Specifically designed for vacuum sealers — must be paired with a non-nozzle type vacuum
sealing machine to function correctly Medical sterilization pouches: Require specialized Medical Pouch Sealers to meet packaging compliance standards 3. Sealing Machine Types Compared: Uses, Output, and Best Fit Before getting into production volume, it's
useful to review the main sealing machine types, their primary uses, and which business profile each fits best. Machine TypePrimary UseBest Fit Hand Type Sealer (Impulse / Constant) Basic bag mouth sealing, small batch Small businesses, workshops, low-volume
operations Foot Sealing Machine Hands-free operation, medium batch sealing Packaging operations requiring both hands free during sealing Nozzle / Non-Nozzle Type Vacuum Sealer Vacuum + seal for extended shelf life Food processing, agricultural produce, meat
and seafood Chamber Vacuum Sealer Sealing machine for liquid packaging, high-volume vacuum sealing Restaurant central kitchens, food manufacturers Band Sealer (Continuous) Sealing machine for high-volume packaging, production line sealing Food factories, high-volume
packaging lines Semi-Automatic Sealing Machine Stable sealing for medium-high output Commercial operations requiring higher sealing consistency Medical Pouch Sealer Sterilization pouch sealing for medical use Medical facilities, life science manufacturers
4. Impulse vs Continuous Sealing Machine: Key Technical Differences One of the most common questions in our sealing machine buying guide is: impulse vs continuous sealing machine — which is right for my operation? Here's how they differ and when each applies:
Impulse Sealer Heats only when pressed, then cools rapidly. Faster cycle time, lower energy use. Suitable for light to medium-frequency sealing operations with standard PE or OPP bags. Constant Heat Sealer Maintains continuous heat. Better for thicker bag
materials, laminated pouches, or applications requiring a wider, stronger seal line. Common in industrial packaging environments. Continuous Band Sealer Bags pass through continuously on a conveyor — no pause between cycles. Ideal for high-volume packaging
lines where throughput is the primary requirement. 5. Vacuum Sealing vs Standard Sealing: Choose by Application Many buyers confuse standard sealing with vacuum sealing. A standard sealer heat-seals the bag opening. A vacuum sealer removes air from the bag
before sealing. The right choice depends entirely on your packaging application requirements. Decision guide — vacuum sealing or standard sealing? Need to extend shelf life or prevent oxidation → vacuum sealing required Need only to seal against dust, moisture,
or contamination → standard sealing machine is sufficient Medical sterilization pouch sealing → medical pouch sealer required High-volume continuous production → evaluate band sealer or continuous vacuum sealer 6. Production Volume: Matching Daily Output to
the Right Equipment Scale Production volume is often the most overlooked factor in the sealing machine selection process. Undersized machines create throughput bottlenecks; oversized machines waste capital. Use this table to match your daily output to the
appropriate sealing machine category: Daily OutputRecommended Equipment Low volume (up to ~50 units/day) Hand Type Sealer, compact vacuum sealer Medium volume (hundreds of units/day) Chamber Vacuum Sealer, Semi-Automatic Sealer High volume (continuous production
line) Band Sealer, Nozzle Type Vacuum Band Sealer 7. Before Purchasing: 4 Things to Confirm 1. Product Content Solid, liquid, or powder — product type determines the sealing method and machine configuration required. 2. Bag Material PE, aluminum foil, sterilization
pouches, or vacuum channel bags each require specific machines and heating methods. 3. Daily Output Volume Match equipment scale to daily volume — the most commonly overlooked factor in a sealing machine buying decision. 4. Vacuum Sealing Required? Shelf-life
extension and oxidation prevention require vacuum sealing. Simple containment does not. Dailysealing: Sealing Machine Manufacturer for B2B and Industrial Buyers Dailysealing is a professional sealing machine and vacuum sealer manufacturer with an in-house
factory and decades of packaging machinery production experience. If you're not sure how to choose the right bag sealing machine for your operation, our team can evaluate your product type, bag material, daily output, and application requirements — and recommend
the most suitable sealing machine from our full product range. Frequently Asked Questions Q1: How do I choose the right sealing machine for my business? The most important sealing machine selection criteria are: product content type (solid, liquid, powder),
bag material, daily output volume, and whether vacuum sealing is required. These four factors allow you to narrow down the machine type quickly and accurately. Q2: What is the difference between a sealing machine and a vacuum sealer? A sealing machine heat-seals
the bag opening to create a sealed closure. A vacuum sealer first removes air from inside the bag before sealing — used when shelf-life extension or oxidation prevention is needed. If your product only needs containment, a standard sealing machine is sufficient.
Q3: What sealing machine is recommended for aluminum foil bags? Aluminum foil and laminated composite bags require an adjustable-temperature constant heat sealer capable of delivering sufficient heat through the material layers. Standard impulse sealers may
not provide enough heat for reliable sealing. Confirm the machine's material compatibility before purchasing. Q4: What is the difference between impulse and continuous band sealers? Impulse sealers heat and cool per cycle — fast, energy-efficient, suited for
low-to-medium frequency use. Continuous band sealers run non-stop along a conveyor belt and are designed for high-volume production lines where packaging speed and throughput are the primary priorities. Q5: How do I read and compare sealing machine specifications?
Three key specifications to compare: seal length (must be equal to or greater than your bag opening width), seal width (wider seal lines provide stronger closure for thicker materials), and heating method and wattage (determines heating speed, temperature
stability, and material compatibility). These three values tell you whether a machine fits your packaging requirements. Not Sure Which Sealing Machine Is Right for You? Share your product type, bag dimensions, daily output volume, and application requirements.
Dailysealing will help you identify the most suitable sealing machine or vacuum sealer for your packaging operation. View All Sealing Machine Series Contact Us // //
MORE

2023/1/5
2023 Chinese New Year Festival
Dear Sirs, In accordance with government guidelines on Lunar New Year Festival, Daily Sealing will be closed from January 20 to January 29, 2023 for a vacation break. We are very grateful for your patronage and collaboration in the past year, and would
like to take this wonderful opportunity to wish you Happy New Year! Yours truly, Daily Sealing System Co., Ltd.
MORE